We usually wear clothes. Jumpers are easy to deform. Knitted trousers wear holes at the knees first. Socks sometimes have toes that poke out. Consumers often wonder if these problems are due to poor fabric quality. Or the characteristics of the fabric itself? In fact, these questions boil down to whether the fabric is durable or not. The burst strength test is a key mechanical test for textiles. It assesses fabric durability. We can now assess the strength of fabrics, like knitted and non-woven ones. We do this using their swelling and breaking properties.
Breaking mechanism
The fabric was subjected to a circular stress at a certain speed. Each direction of elongation caused a composite shear stress in the fabric. This stress first deformed the fabric at its strongest and weakest points. Then, it broke the yarn. Finally, it tore along the straight or transverse (warp or weft) directions. It created a right-angled or straight-line rupture.
Definition of Terms
Test Area: The area of the specimen within the circular gripper.
Bursting Pressure: The max pressure on a specimen, clamped with a lower cushion diaphragm, until it ruptures.
Bursting Force: It is the average bursting pressure minus the diaphragm pressure.
Diaphragm Pressure: If no specimen exists, it is the average pressure to expand the specimen using a diaphragm.
Expansion: the degree of a specimen’s expansion at the expansion pressure. A change in height or volume expresses it.
Expansion height is the distance between the specimen’s upper surface before expansion and its top at the expansion pressure.
And expansion volume: the volume of liquid required to reach the expansion pressure.
Expansion time: the time required for the specimen to rupture.
Definition:
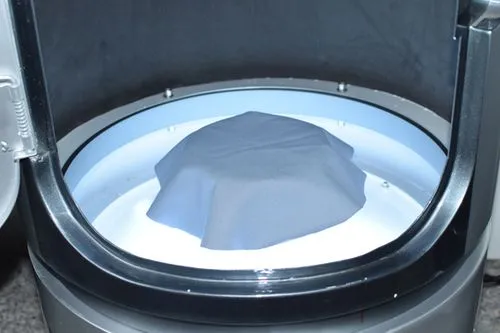
Swelling is a phenomenon. It occurs when a load causes the fabric, which is perpendicular to the load, to bulge, expand, and rupture.
The burst strength of a fabric is an important mechanical index of the fabric.
Test significance
Tensile strength is not suitable for some fabrics, like knits and lace. Bursting strength can replace it.
Fabric breakage is often due to warp, weft, and diagonal pressures. This is especially true for some knitted fabrics, like weft knits. They have a straight extension and lateral contraction. Their straight and lateral aspects affect each other.
To conduct tensile strength tests, test the warp, weft, and diagonal. A one-time test can check the fabric’s rupture strength.
Mechanism of swelling and breaking
Woven fabric deforms in the direction of the non-weft and warp yarns. The deformation is due to the shearing of the warp and weft yarns. This causes greater elongation than in the warp and weft directions. Under a tensile force, the yarns break at their weakest points. Then, a tear forms along the warp or weft directions, resulting in a straight line. If the fabric’s warp and weft have similar limits, the top will break when both yarns break at the same time. This often causes an L- or T-shaped crack. It shows that both yarns equally affected the top’s breaking strength. That strength is higher in the case of straight-line cracks.
Knitted fabrics resist stretching until the loops link and the fabric tears.
Non-woven fabrics: The main issues are fibre breakage and a loosened network. The top break is a bulging package of loose fibres. Expansion has torn and cracked the fiber network.
Expansion and breaking mechanism:
Plain tissues split along the fabric’s length. Coil detachment is greater across the width.
Whereas, for pearl ground tissue
The breakage is a hole. The damage is mainly yarn breakage, with little or no coil breakage.
The three methods have similar damage mechanism: weak loop theory.
The weak ring theory shows that tension or swelling in the fabric will initially damage a weak spot. Then, stress will set in at that damage. As the test proceeds, loops will form on the transverse side of the damage. The cracks will then expand along the longitudinal direction. In beaded fabric, more yarn will break and the cracks will expand outward.
Test Standard
Part 1: Test bursting strength and expansion of textile fabric by hydraulic method (GB/T7742.1-2005).
Textile fabric bursting properties. Part 1: Determination of bursting strength. Hydraulic method (ISO 13938-1:1999).
Test Method for Determining the Rupture Strength of Textiles by a Film Rupture Strength Tester. (ASTM D3786/D3786M:2013)
GB/T 7742.2-2015 “Textiles. Expansion performance of fabrics. Part 2: Determination of expansion strength and expansion dilatancy by pneumatic method.”
ASTM D3786/D3786M-2018 “Test Methods for Textile Bursting Strength Diaphragm Method”.
ISO 13938-1:2019 Textiles. Expansion properties of fabrics. Part 1: Bursting strength and expansion. Hydraulic method.
ISO 13938-2:2019 “Textiles. Expansion properties of fabrics. Part 2: Determination of expansion strength and expansion dilatancy. Pneumatic method.”
The Chinese standard differs from the American ASTM. It clearly defines the medium. It has separate standards for gas and liquid. The American ASTM includes both gas and liquid. Also, the Chinese standard tests 5 points. The American standard tests 10.
Testing Principle
An extendable diaphragm clamps the specimen. Applying liquid pressure under the diaphragm expands both it and the specimen. The liquid volume increases at a constant rate until the specimen ruptures. The swelling strength and dilatancy are then measured.
Which products within the current product standards need testing for these properties?
Current product standards include tests for top burst strength. These are:
-
GB/T 22848-2009 “Knitted Finished Fabric”
-
GB/T 22849-2014 “Knitted T-shirts”
-
GB/T 22854-2009 “Knitted Student Clothing”
-
FZ/T 73010-2016 “Knitted Craft Shirts”
-
FZ/T 73032-2017 “Knitted Denim Clothing”
-
FZ/T 73056-2016 “Knitted Western Clothing”
-
FZ/T 73037-2019 “Knitted Sports Socks”
-
FZ/T 73060-2017 “Integral Moulding Knitted Upper” and many other common standards.
The ones to be assessed for bloating are GB/T 31888-2015 “School Uniforms for Primary and Secondary School Students” (wool knit category), FZ/T 73009-2009 “Cashmere Knitwear”, FZ/T 73018-2012 “Wool Knitwear”, FZ/T 62014 -2015 “Mosquito nets”, FZ/T 64017-2011 “Needle-punching compression elastic non-woven fabrics” and so on.
What textile quality issues can this test show?
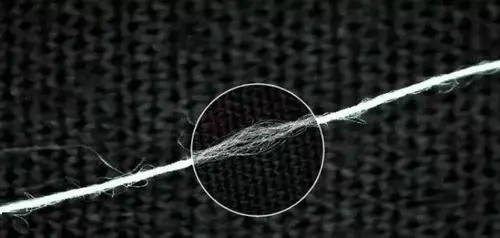
This indicator helps firms and consumers. It shows the breakage performance of products, especially knitwear and some non-woven fabrics. Product breakage analysis tests single yarn performance. Dismantling the coil and loose, stranded yarn to see the single yarn is a detailed but tedious task. Knitted fabrics are generally better than woven ones. The knitted coil structure affects consumer use. So, we cannot judge product performance based only on the single yarn. Directly test the top, broken or swollen areas. They should imitate the knitted fabric by the elbow, knee, and toes. Push the fabric to deform it and measure the bursting force. This is a very intuitive and effective test method.
Main factors affecting the breaking strength of fabrics
Yarn breaking strength and elongation affect fabric performance. High bending stiffness makes the fabric hard to bend and break. This helps improve the fabric’s breaking and bursting strengths. With other conditions the same, a thicker fabric is stronger. It has greater breaking and bursting strengths.
Fabric warp and weft density
If the warp and weft densities differ, the fabric will tear along the direction of the lower density. This is true under the same conditions. This is due to the fabric’s low top breaking strength, resulting in a straight tear. When the warp and weft densities are similar, both yarns will share the load. The fabric will tear in both the warp and weft directions, creating an L-shaped split.

Yarn hook strength
In knitted fabrics, strong yarn loops mean high top and swelling breaking strength.
Instrumentation
GB/T7742.1-2005 and ISO13938-1:1999 set standards for a swelling and breaking instrument. It must meet them.
The bursting strength tester shall have a constant volume growth rate in the range of 100-500cm³/min with an accuracy of ±10%. If the instrument lacks a liquid volume regulator, use an expansion time of (20±5)s. We must note this in the report. The accuracy is 2% of the full scale when the bursting force is more than 20% of the full scale. When the bursting height is less than 70mm, the accuracy is -1mm. At the test’s start, the spacer’s zero point must adjust to the specimen’s thickness. If we can display the volume of expansion, the accuracy will not exceed ±2% of the displayed value. We shall use a test area of 50cm² (79.8mm diameter).
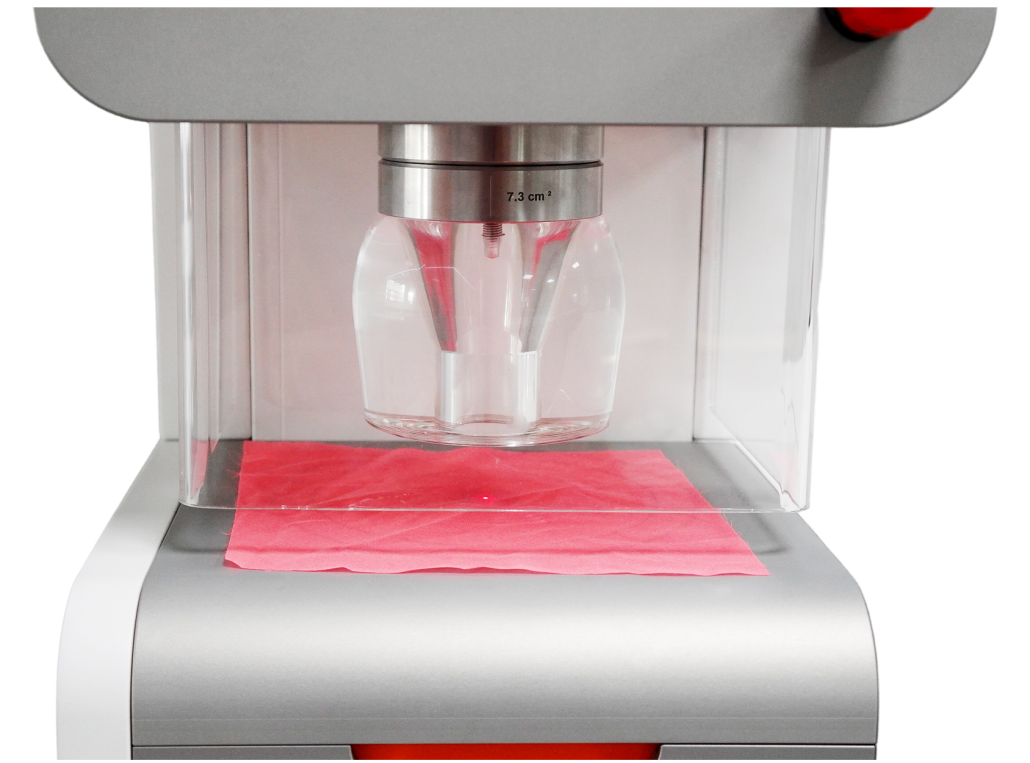
Note: If the preferred test area is unavailable, use other areas, such as 100 cm² (112.8 mm diameter), 10 cm² (35.7 mm), or 7.3 cm² (30.5 mm). This applies if fabrics have different stretch properties. It also applies if there are other multi-party agreement requirements. The clamping device must clamp the specimen reliably. It must not damage, deform, or slip the specimen during the test. The clamping ring must not obstruct the rounded arch of highly extended fabrics. Their swelling height is greater than half the specimen’s diameter. The inner diameter of the specimen clamping ring shall be accurate to ±0.2 mm. To avoid damaging the specimen, round the inner edge of the ring that contacts it. The safety cover must enclose the clamping device. It should allow a clear view of the specimen’s extension during the test. The diaphragm is less than 2mm thick and highly elastic. It shall be elastic within the expansion height after several uses.
ASTMD3786D3786M:2013, The instrumentation shall meet the following requirements:
Use a press-top break film tester. Also, use a motor-powered drive tester to avoid disputes. Unless the buyer and seller agree otherwise. The fixture holds the test specimen, without slippage, between two parallel, horizontal, stainless steel plates during testing. It does this securely and consistently.
Note: Both fixture surfaces have a coaxial aperture of (31±0.75) mm diameter with a minimum diameter of 75 mm. The fixtures’ surfaces, at each end of the sample, have closed lines. They space at least 0.8 mm apart and start at the edge of the hole. They must be 0.015 mm deep or more.
The fixtures are metal. They rounded their edges, which could cut, to a 0.4 mm radius. The lower fixture has a small chamber. A screw forces the hydraulic fluid to flow at a rate of (95±5) mL/min to the rubber film. The pressure gauge is a Bolden-type manometer. It has a gradient in pounds and an accuracy of 1% of the max value. The manometer’s capacity is 25% to 75% of the total capacity.
The hydraulic system controls the pressure to the film. It does this until glycerol distends the sample at a flow rate of (95±5) mL/min. A piston in the device’s pneumatic pressure regulating chamber controls glycerol displacement. The chamber fluid should be 96% pure (UPS) propanetriol. The hydraulic system containing the manometer is set up to prevent vibration. After sample breakage, methods keep the pneumatic chamber’s volume constant. Then, we record the full top break pressure and the pressure to expand the film. A calibrated aluminium foil has an expansion breaking strength of 70 to 790 kPa (10 to 115 psi). The tester prepares it for testing. Then, he uses it to check all operating characteristics.
Specimen preparation
GB/T7742.1-2005 and ISO13938-1:1999. Take 5 lab samples with a test area of 50cm².
ASTM D3786/D3786M:2013.Take 10 lab samples. Each must be a square with 25mm sides or a circle with a 125mm diameter.
Test Procedure
GB/T7742.1-2005 and ISO13938-1:1999, the test procedure is as follows:
Before conducting the test, humidify the sample in a standard atmosphere. Furthermore, you must conduct the test in the specified atmosphere.
Set a constant volume growth rate of 100 to 500 cm³/min. Or, pre-test and adjust for a swelling time of (20±5)s.
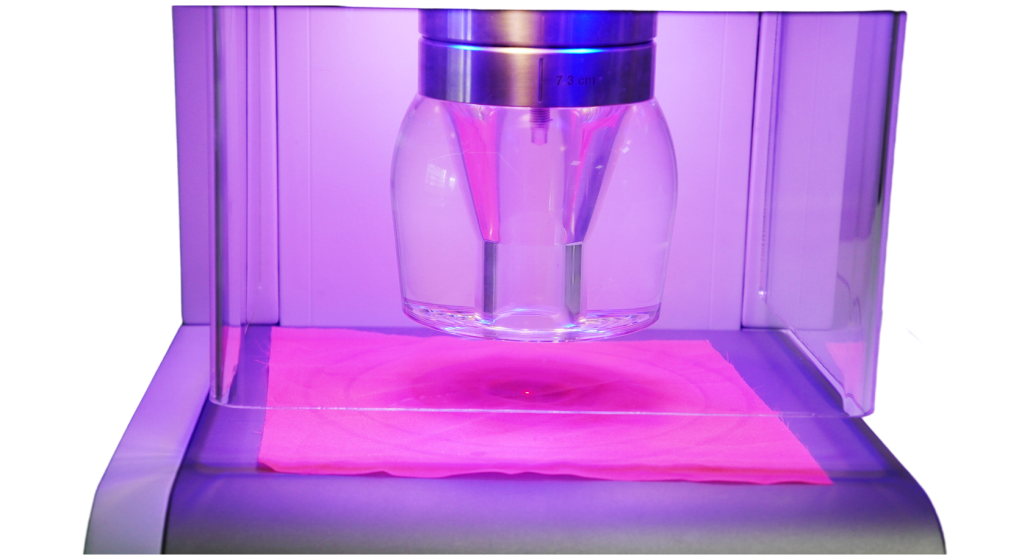
They placed the specimen flat and tension-free on the diaphragm. A clamping ring held it in place to prevent slippage during the test. Set the dilatancy device to zero. Then, tighten the safety cap as per the instrument. Apply pressure to the specimen until it expands.
After bursting, reset the instrument. Then, record the bursting force, height, or volume. If the specimen bursts close to the edge of the clamping ring, report this fact. Repeat the test on different parts of the fabric to achieve a minimum number of 5 tests. If both parties agree, they may also increase the number of tests.
Measurement of diaphragm pressure. Expand the diaphragm without a sample. Use the same test area, volume increase rate, and bursting time as in the above tests. It expands a sample until it reaches the average bursting height or volume. At that point, the bursting strength is the “diaphragm pressure.”
ASTMD3786/D3786M:2013, the test procedure is as follows:
Nest the sample under the tripod. Firmly press it against the plate. The clamping handle must be as far right as possible on the sample on the plate.
Move the operating handle to the left to extend the film.
While the film is stretching, hold the grip of the operating handle below or to the right. Upon sample breakage, turn the grip to set the lever to neutral. Then, record the total breakage force.
After the break, release the clamping handle on the sample. Then, turn the wheel counterclockwise to the start. This will release the tension on the film. Record the pressure needed to expand the film.
Calculation of results
As described below, we calculate the test results for GB/T7742.1-2005 and ISO13938-1:1999.
Calculate the average value of the swelling breaking strength in kilopascals (kPa). Subtract the diaphragm pressure from this value. This gives the bursting force, trimmed to three significant figures.
Find the mean of the bursting height in mm. Trim the result to two significant figures.
If needed, calculate the average bursting volume in cm³. Trim it to three significant figures.
If needed, calculate the CV and 95% confidence intervals for bursting force and height. Trim the CV to the nearest 0.1%. Round the intervals to the same significant figures as the mean.
ASTMD3786M:2013 describes how to calculate the test results as follows:
We calculated the swelling strength of each sample. And we did this by subtracting the stent pressure that caused the film to stretch from the swelling strength.
We recorded the breaking strength and its mean value for each sample.
Note: Manual calculation of test results may have errors. The market expansion tool can now auto-generate test results and support a key to export data.
What are the difficulties and problems to be noted in testing?
First, the specimen must be representative. The test area should avoid folding, creasing, and the fabric edge.
Secondly, per the standards, distinguish between the front and back of the specimen. The actual wearing process is front-facing. It aims to simulate the human body’s normal state of wearing clothes. The swelling and breaking are from the bottom upwards. So, the sample’s reverse is to the diaphragm, and the front side is facing up. This matches the actual wearing process. According to the standard requirements, dampen the sample as well.
Again, to control the swelling time, a pre-test controls the flow rate. In the subsequent test, the instrument will adjust the flow rate based on the pre-test. This will ensure the swelling time is in the range of (20 ± 5) s. If the swelling time is not (20 ± 5) seconds, round the points and re-test.
If more than one point burst time is out of range, check the instrument for faults, oil leaks, or a loose test cover. Also, those applying the standard must know the top break and expansion methods. They must understand their parameters and details.
For the test speed, some standards set the bullet diameter, the test area’s inner diameter, and the number of specimens. Some details need negotiation. For example, different test areas and slug diameters for bursting affect the results. The sock standard FZ/T 73037-2019 specifies a 20mm steel ball. The integrally moulded knitted uppers standard FZ/T 73060-2017 uses a 25mm steel ball. Both are footwear standards. The reason is that small diameter steel balls better match actual use.
We must focus on the key parameters when negotiating the test settings. Also, the test report should reflect the selected key parameters to improve readability.
Fabric Bursting Tester Classification
You can divide fabric expansion testers by their power source and intended use. There are pneumatic and hydraulic testers by power. There are manual and electronic testers by use. ChiuVention’s are electronic testers. The specific classification is as follows:
1 pneumatic bursting tester
Working Principle: The pneumatic bursting tester uses gas (usually air) as a medium. It applies pressure through a pneumatic system to rupture the sample.
Scope: It tests the bursting strength of woven, knitted, or non-woven fabrics, paper, or board.
Standard: GB/T7742, FZ/T60019, ISO 13938.2, NEXT TEST METHOD 22 2006, WOOLMARK TM29 2000, EDANA 80.3-99, ISO 2758, ASTMD 3786, JISL108, etc.
2 Hydraulic Expansion Tester
Working Principle: The Hydraulic Expansion Tester uses a liquid, usually water or oil. It is the medium. It applies pressure through a hydraulic system to tear or break the sample.
Scope: To test the breaking strength of woven, knitted, non-woven fabrics, and paper or board.
Standard: ASTM D3786, ERT 80-4-20, GB/T 7742.1, BS EN ISO 13938-1, BS 3424-6-B, ISO 3303-B, ISO 2758, ISO 3303.2, ISO 3689, JIS L1018.
3 Electronic Bursting Tester
Working Principle: It uses electronic sensors and digital control technology. It measures the tearing strength and breaking performance of the sample. It uses electronic pressure sensors.
Scope: To test the swelling and breaking resistance of all fabrics, nonwovens, papers, and plastic films.
Standard: ASTM D3786, ISO 13938-1, ISO 2758, ISO 2759, EN 12332-1, JIS L 1096 , GB/T 7742.1
4 Manual Expansion Tester
Principle of Operation: Hand-operates the manual bursting tester. It applies pressure to make the sample tear or break.
Scope of application: Simple structure, easy to use, no power needed. It is suitable for simple on-site tests and teaching. For example, it can demonstrate mechanical properties in academic labs and schools.
Standard: ASTM D3786, ISO 13938-1, ISO 2758, ISO 2759, EN 12332-1, JIS L 1096, GB/T 7742.1
The main differences between hydraulic and pneumatic bursting testers
Fabric bursting strength tests are mainly hydraulic and pneumatic methods. The devices used are fabric hydraulic and pneumatic bursting testers, respectively. The hydraulic and pneumatic testers differ in many ways. Their working principles, uses, performance, and operating modes are all different.
Hydraulic testers use a liquid, like water or oil, to apply pressure until the sample bursts. Their pressure control is precise and stable. They suit many textiles and films. And they also work for high-precision measurements. They are widely used in labs and testing organizations. The pneumatic bursting tester uses a gas (e.g. air) to apply pressure. It is fast to regulate. It is good for quickly testing many samples, e.g., for quality control on production lines. Also, the pneumatic burst tester uses air, a pollution-free medium. It meets environmental protection standards.
Hydraulic burst testers are more stable and accurate. They are best for high-precision tests. But, they are harder to operate and cost more to maintain. In contrast, pneumatic breakage testers are easy to use and maintain. They are usually lightweight and portable, so they are good for quick, on-site testing.
Hydraulic bursting testers are suitable for tests that require high accuracy and stability. Pneumatic bursting testers are more suitable for rapid testing and environmentally friendly applications.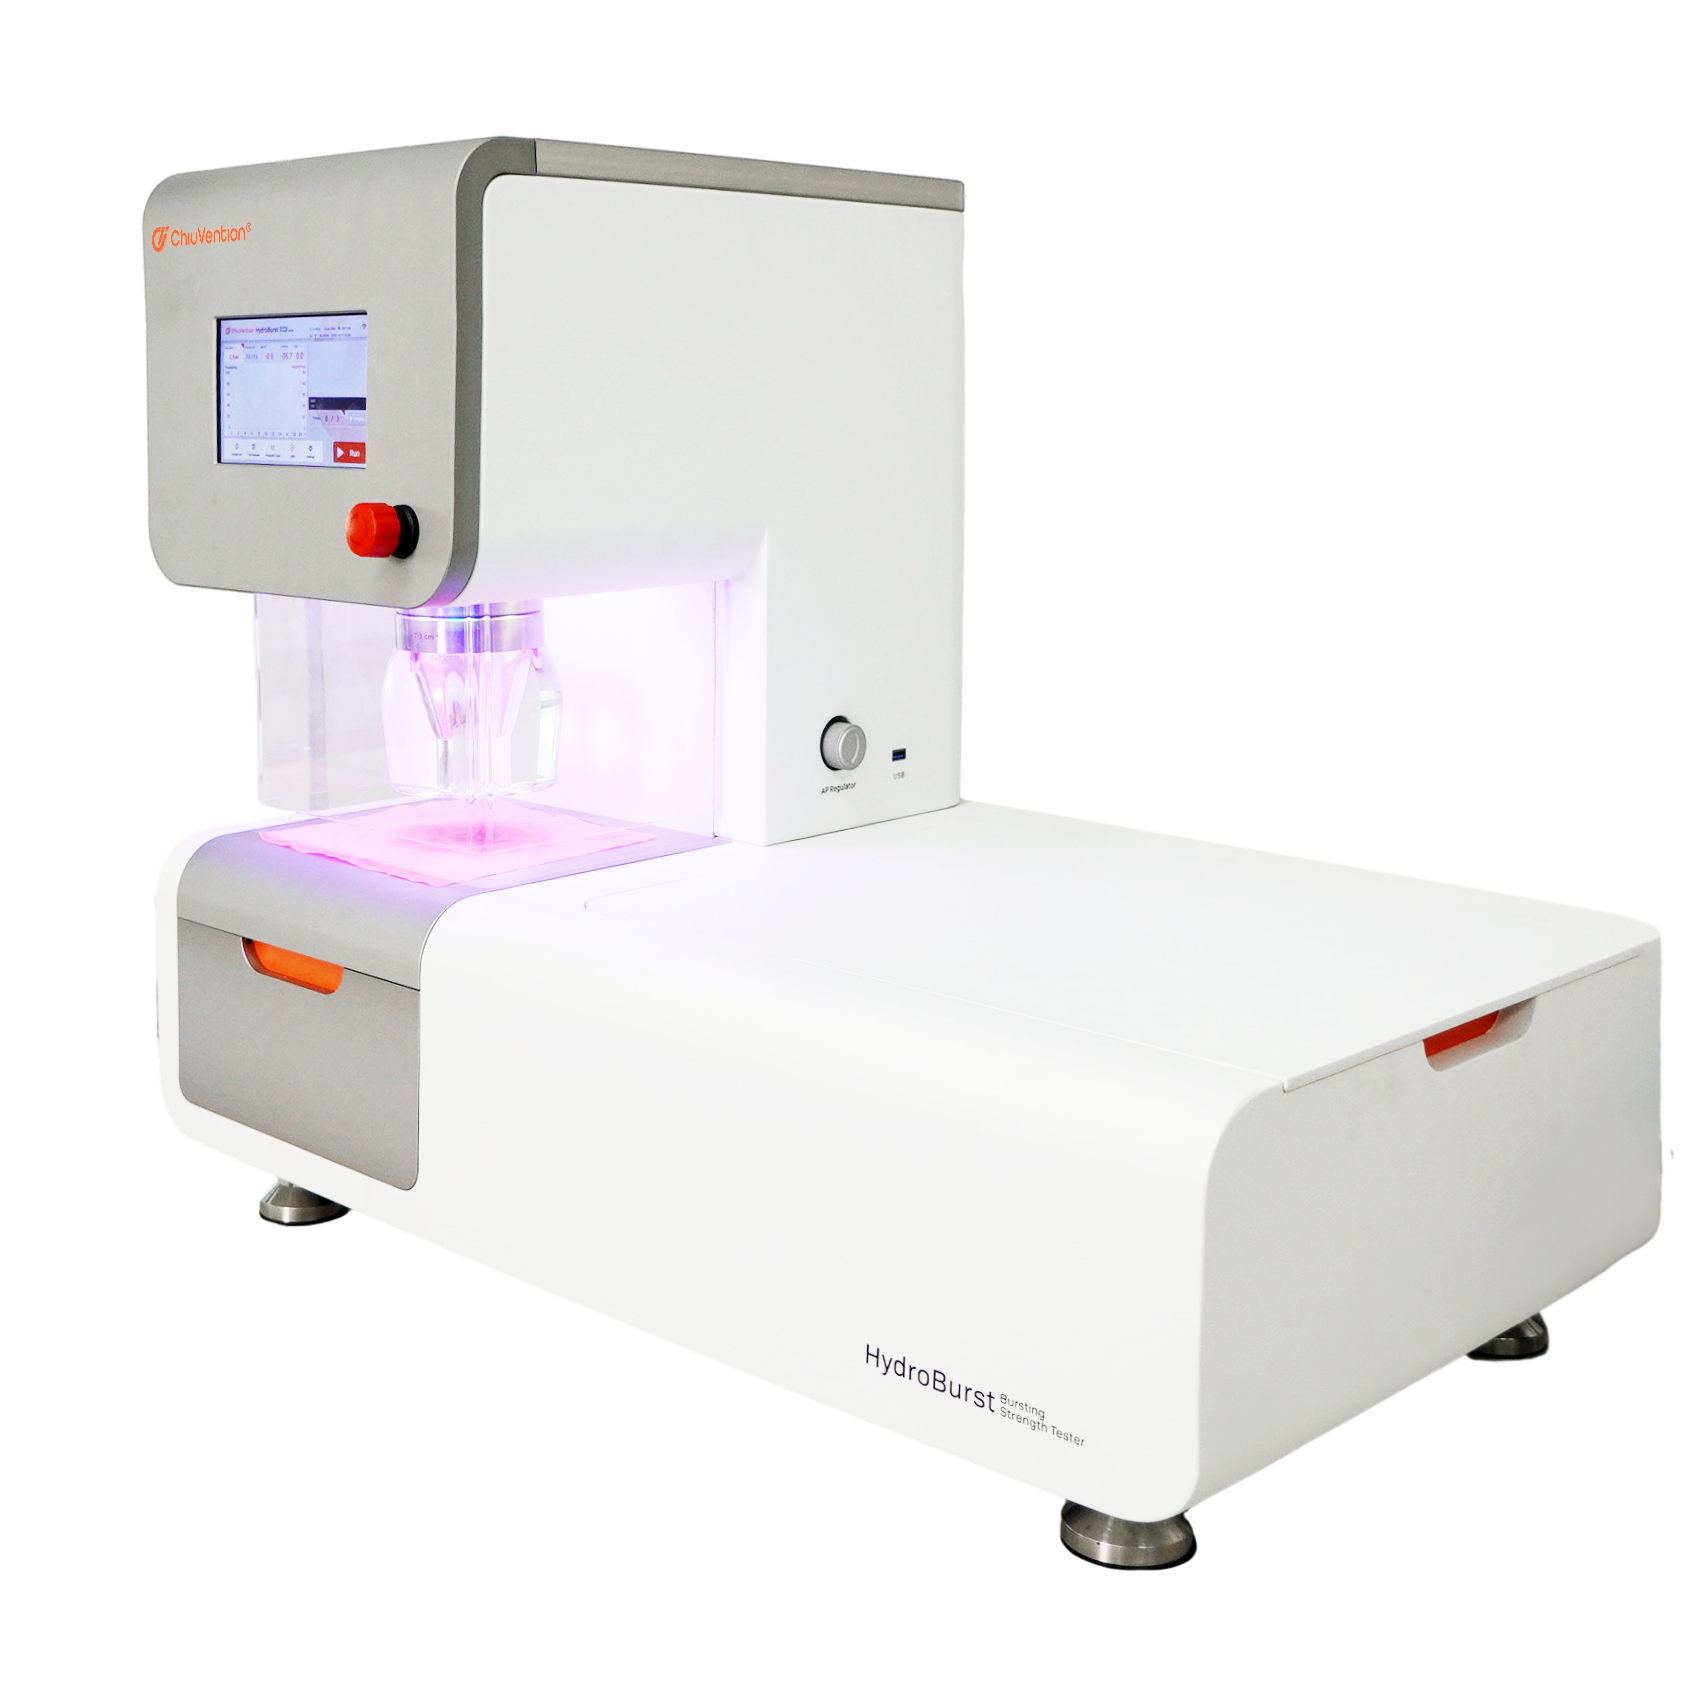
The right bursting tester will improve test accuracy and reliability.
How to choose the right bursting tester?
Determine the application and test requirements
First, define the test’s specific application scenarios and needs. It includes the material type (e.g., textile, film). It includes the test frequency (lab, production line, or on-site). The mechanical properties that need testing include tear strength and breaking strength. It includes the requirements for test accuracy and stability.
Consider test accuracy and stability
Choose the right tester for the accuracy required. Hydraulic bursting testers are more accurate and stable. They suit places with strict test accuracy requirements. Pneumatic bursting testers are easy to use. But, they have low pressure stability. So, they suit on-site, quick tests where accuracy is less critical. At pressures below 80kPa, both testers are equally strong. For special textiles that require higher tester pressures, hydraulic testers are better.
Consider the operation and maintenance of the equipment
Hydraulic systems usually need specialists to operate and maintain them. Non-specialists can operate pneumatic systems, which are simpler. Also, consider the equipment’s durability and failure rate. Choose reliable, low-maintenance, and cheap equipment.
Consider test automation and data processing capabilities
Expansion test instruments usually have data systems. They can record and analyze test data in real time. They also provide detailed test reports. Select intelligent instruments with automation and data management functions as needed. They will enhance testing efficiency.
Consider budget and cost
Hydraulic systems are usually more expensive. But, they are more accurate and stable. Pneumatic systems are cheaper and good for tight budgets.
ChiuVention Expansion Tester Series
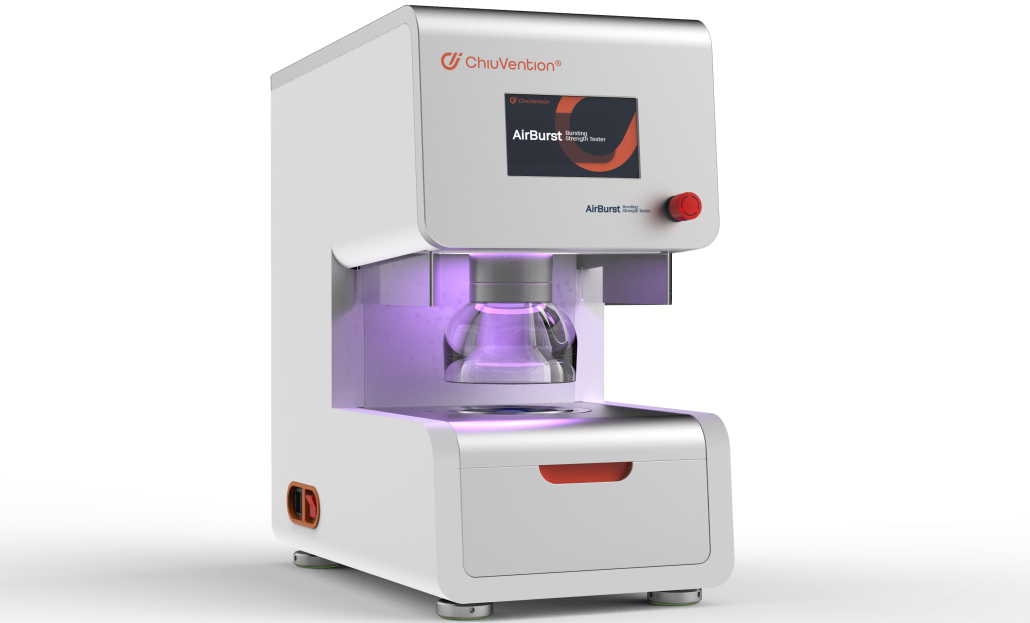
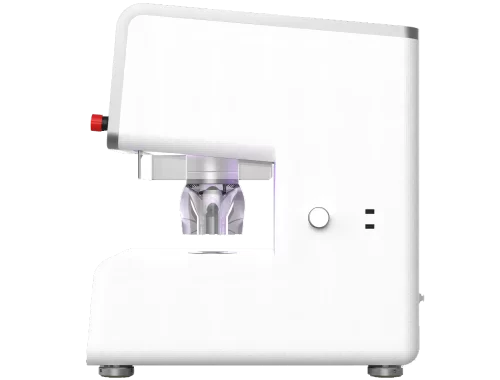
AirBurst Pneumatic Bursting Strength Tester
The AirBurst tester tests the bursting strength of textiles, films, paper, and foam. Its simple design makes it easy to operate and maintain.
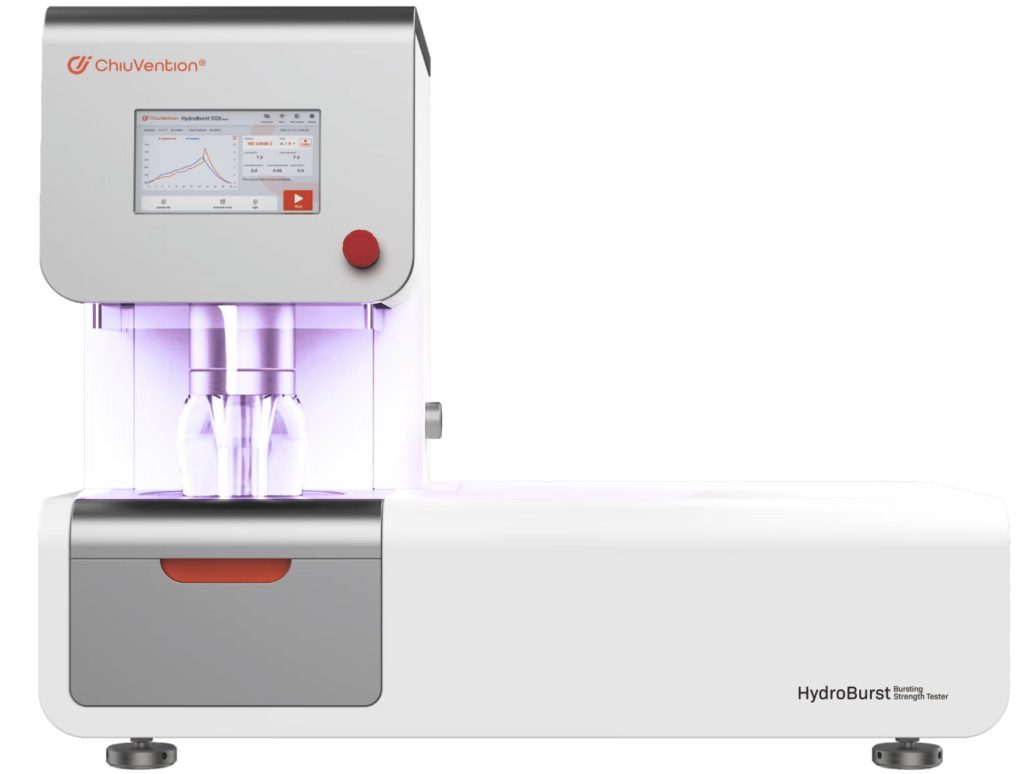
HydroBurst Automatic Bursting Strength Tester
The HydroBurst Automatic Bursting Strength Tester tests fabrics and materials. It uses a hydraulic drum explosion to test their bursting resistance. (elastic diaphragm method) This includes knitted, woven, nonwoven, laminated, elastic woven fabrics, and paper. It tests the materials in the warp, weft, and all directions at once. The test follows FZ/T01030-2016 method B, GB/T 7742.1-2005, ISO 13938-1-2019, ASTM D3786/D3786M-18(2023), and EN 12332-2-2002. The HydroBurst Hydraulic Expansion Tester is for high-pressure tests. It works with high-strength textiles and leathers.
The above two devices are smart instruments. You can network them with the SmarTexLab app on your phone using WIFI. The mobile phone can set parameters and monitor tests. It can also alert users to equipment warnings and low supplies. It can also share the test status with one click.
Calibrate the Hydraulic Burst Strength Tester. Connect the gauge to the connector shown above. (NOTE: tighten the gauge 2-3 turns, then open the calibration valve and tighten the gauge again. Any failure may result in damage to the gauge.)
Turn on the pressure gauge and adjust the unit of the pressure gauge to MPa to keep it in line with the Digital Bursting Strength Tester.
Click Settings to enter the calibration interface
Place a specimen on the fixture, and click DOWN to get it pressed.
Click PUSH to pressurize the specimen. When the pressure is between 0.05 – 0.2Mpa, click “Oil Pressure” button to put the gauge’s value in the white box. Then, confirm.
As pressure calibration is complete, click Relief, and the pressure returns to 0. Then, close the calibration valve and remove the gauge. Then Article 5.4.2.4 (based on the operation manual) Automatic Film Leveling can be applied.
Height calibration: Complying with Article 7.2.3(based on the operation manual), enter 0 in the “Height” box.
Air pressure calibration test: Connect the compressed air tube to a tee connector. Put the air pressure gauge on one end and the air inlet on the other end (rear: AIRINTAKE connector). Enter the value of the air pressure gauge into the “Air Pressure” button and then confirm the calibration test.
Maintenance
Regular Maintenance
Daily Inspections:
Check for Leaks: Inspect the hydraulic system for any signs of fluid leaks. Look at hoses, connections, and seals.
Clean the Digital Bursting Strength Tester: Wipe down the machine to remove dust and debris. Ensure the clamping area is free from residue.
Check Fluid Levels: Ensure the hydraulic fluid is at the correct level. Top up if necessary with the recommended type of hydraulic fluid.
Weekly Maintenance:
Inspect Moving Parts. Look for wear on parts that move, like the piston, diaphragm, and clamping mechanisms. Lubricate as needed according to the Bursting Strength Tester Manufacturer ChiuVention’s guidelines.
Verify Calibration. Check the gauge or sensor’s calibration. This check ensures accurate readings. Use standard weights or reference materials to verify accuracy.
Monthly Maintenance:
Test Safety Features. Make sure all safety features work. These include emergency stop buttons and pressure relief valves.
Inspect Electrical Components. Check connections and wiring for damage or wear. Ensure there are no loose connections.
Annual Maintenance:
Full System Check: Perform a comprehensive inspection of the entire system. This includes checking the integrity of the hydraulic hoses, seals, and pressure gauges.
Professional Calibration: Have the machine professionally calibrated to ensure long-term accuracy.
Software Updates: If the Bursting Strength Tester has software, make sure it is updated.
Repair
Common Issues and Solutions
Hydraulic Leaks:
Identify the source: Inspect hoses, seals, and connections to find the source of the leak.
Replace Seals and Hoses. Use parts approved by ChiuVention to replace any damaged ones.
Tighten Connections: Ensure all hydraulic connections are properly tightened.
Pressure Inconsistencies:
Check Fluid Levels: Low hydraulic fluid can cause pressure issues. Top up if needed.

Bleed the System: Air in the hydraulic lines can cause pressure fluctuations. Bleed the system to remove any trapped air.
Inspect the Pump: Ensure the hydraulic pump is functioning correctly. Replace if necessary.
Inaccurate Readings:
Recalibrate the Gauge: Regular calibration is essential for accurate readings. Follow the Bursting Strength Tester Manufacturer ChiuVention’s instructions for calibration.
Check for Sensor Issues: If the pressure sensor is faulty, it may need to be replaced.
Mechanical Failures:
Replace Worn Parts. If any parts are worn or damaged, replace them with parts approved by the manufacturer.
Lubricate moving parts. They should be well-lubricated. This prevents wear and tear.
For more information on textile testing methods/standards
or textile testing machines, contact us:
What’s App: +86 180 2511 4082
Tel: +86 769 2329 4842
Fax: +86 769 2329 4860
Email: medium@chiuvention.com