1. Purpose and Scope
1.1 This test method aims to evaluate the resistance of fabrics and other flexible materials to abrasion.
2. Principle
2.1 An impeler (rotor) drives an unfettered fabric specimen along a zigzag course in a generally circular orbit within a cylindrical chamber, causing it to repeatedly impinge on the walls and abradant line of the chamber while continually subjecting it to extremely rapid, high-velocity impacts. The test subjects the specimen to flexing, rubbing, shock, compression, stretching, and other mechanical forces. Rubbing yarn against yarn, fiber against fiber, surface against surface, and surface against abradant produces abrasion throughout the specimen.
2.2 The evaluation occurs based on the weight loss of the specimen or the grab strength loss of the (woven) specimen when it breaks at an abraded fold line. Generally, either method may evaluate flat woven fabrics. The weighs loss method evaluates tufted and other fabrics with raised surfaces, as well as knit fabrics.
2.3 Changes in other fabric characteristics may also be useful for evaluating abrasion resistance with the Accelerotor.
3. Terminology
3.1 Abrasion, n.-the wearing away ofi any part of’ a material by rubbing against another surface.
4. Safety Precautions
Niote: These safety precautions are for information purposes only. The testing procedures include ancillary precautions that are not intended to be all inclusive. Users must take responsibility for using safe and proper techniques when handling materials in this test method. Users must consult manufacturers for specific details such as material safety data sheets and other manufacturer’s recommendations. Everyone must also consult and follow all OSHA standards.
4.1 Good laboratory practices shouldbe followed. Wear safety glasses in alllaboratory areas.
4.2 Keep the door of the Accelerotor closed whenever the motor is running. Follow the manufacturer’s safety recommendations when operating laboratory testing equipment.
4.3 We recommend that operators who work regularly with the Accelerotor wear a face mask to guard against inhalation of fiber dust.
5.Uses and Limitations
5.1 The results obtained by this methodare affected by duration; the size, shapeand angular velocity of the rotor; and bythe type of liner used. These effects areinterrelated, and testing conditions maybe varied to produce different degrees ofabrasion in a test specimen. For example, it may require only 2 or 3 min at 209.44 rad/s (2000 rpm) with the standard of setrotor to produce a reasonable degree of abrasion in a delicate or fragile fabric, while a heavier or more durable fabric may require 6 min at 314.16 rad/s (3000 rpm).
5.2 When fabrics curl or, for other reasons, do not move about freely in the test chamber, testers should discontinue testing.
5.3 The results of this test should notbe equated with service life.
6.Apparatus and Materials
6.1 Accelerotor equipped with the following parts:
6.1.1 Rotor,of set (elongated S-shape), 114 mm (4.5 in.).
6.1.2 Collar insert, plastic, lined with 3.2 mm (0.125 in.) polyure than foam.
6.2 Liner, fine abrasive, 500J grit aluminum oxide cloth.
6.3 Neon lamp or other strobo scopic device,
6.4 Timer, automatic, accurate to ±1 s.
6.5 White glue.
6.6 Pinking shears and marking tem-plates, or cutting dies.
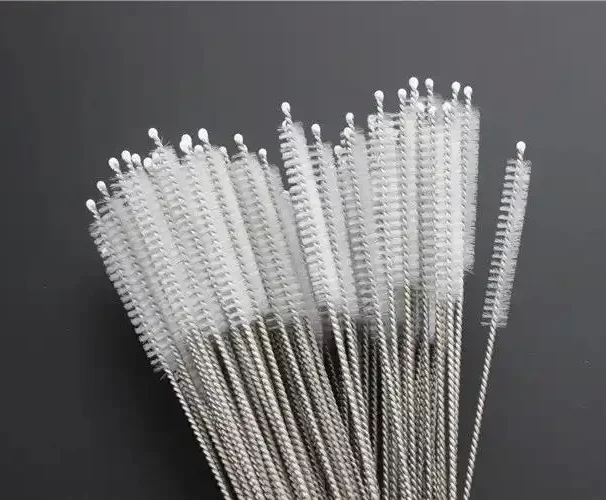
6.7 Brush, nylon, for cleaning Accele-rotor chamber or small portable vacuumcleaner for chamber and specimens.
6.8 Thread, size E, Type I, Class 1 or 2, Fed. Spec. V-T-295.
6.9 Cotton fabric, 78×76 print cloth (carded yarns) 1.2 m (4.6 in.) wide, about 8 m/kg (4 yd/lb), bleached and desized, free from blueing, optical bleach or finishing materials.
6.10 Analytical balance accurate to ±0.001 g.
7.Test Specimens
7.1 In the absence of applicable specifications, you should take a minimum of three specimens from each sample to be tested, ensuring that they are not nearer the selvage than one-tenth the width of the fabric or 64 mm (2.5 in.). Select specimens that represent the entire sample for testing.
7.2 Size of Specimens.
7.2.1 Method A(Evaluation by weightloss)— Cut specimens of heavier or bulkier fabrics smaller than those of lighterfabrics to minimize variations in impact produced when the specimens hit the chamber wall or abradant liner. Table I is
This guide explains the relationship between fabric weight, in grams per square meter (ounces per square yard), and specimen size. You can take specimens with the edges parallel to the warp and filling (courses and wales) or on the bias.
7.2.2 Method B (Evaluation by strength loss)—The specimen size is 100×150 mm (4×6 in.) with the greater dimension in the direction of the yarns tobe broken.Take specimens with their edges parallel to the warp and flling yarns.
7.3 Specimen Preparation.
7.3.1 Method A—Cut a specimen with pinking shears or die.If wovenfabric is die-cut parallel to yarns,ravel 3.2 mm(0.125 in.) along each edge.Place the specimen on plastic sheet(to protect bench top) and apply a 3.2 mm(0.125 in.) strip of adhesive to each cut orraveled edge. Allow the adhesive to dry at room temperature.
7.3.2 Method B—Cut specimens 100×300mm(4×12 in.) (twice the length required for the grab breaking strength test). Number cach specimen at both ends,and then cut in half.Use one half for a control to determine the original grab breaking strength,and the other to deternine grab breaking strength after abrading. Apply adhesive to the edges of the specimens that you will abrade as in Method A. Then fold each specimen perpendicular to the long dimension and 50 mm (2 in.) from one end, creating a 100×100 mm (4×4 in.) shape.) square. Attach the 50×100 mm (2×4 in.) flap with a seam 6mm (0.25 in.) from its edge to the body of the specimen .Use 4 stitches to the centimeter(11 stitches per inch).
8. Accalerotor
8.1 Adjustment of Tachomcter
8.1.1 Rotor-Select and install appropriate rotor. The 114 mm (4.5 in.) offset rotor is standard).
8.1.,2 Neon Lamp—Technicians use the neon lamp as a simple stroboscope to check the accuracy of the tachometer by viewing the spinning rotor. With the test chamber door closed and someone holding the neon bulb close to the window of the door, the rotor produces distinct patterns at several useful speeds. With some practice, you will recognize the following patterns. If the neon lamp operates on 60Hz AC, at 188.50 rad/s (1800 rpm), the rotor appears as a stationary distinct two-bladed figure. At 377 rad/s (3600 rpm), the hub of the rotor appears as a stationary blur, with two slight lobes apparent on the sides of the hub. If the neon lamp operates on 50Hz AC, as in many European countries, the above described test patterns will appear at 157.08 and 314.16 rad/s (1500 and 3000 rpm). If the tachometer does not read the appropriate speed,turn the small screw on the dial face to correct it.
8.1.3 Stroboscope—Set the stroboscope dial at 314.16 rad/s (3000 rpm).Close the Accelerotor door, tum the unit on,and bring the speed of the rotor to a point at which it appears as a stationary,two-bladed figure.If the tachometer does not read 314.16 rad/s(3000 rpm),turn the small screw on its dial face to correct it.
8.2 Liners
8.2.1 Installation of Liners—Place liner into collar insert and,with the fingers,work liner around the insert wall until it fits snugly and smoothly without any crease.
8.2.2 Breakin of Fresh Liner—Inset the prepared collar insert into the Accelerotor equipped with the selected rotor. Break in the abrasive liner by running two successive 114 mm (4.5 in) square specimens of 78×76 finish-free cotton print cloth,edged with adhesive . Close the door,start the Accelerotor,maintain rotor speed at 314.16 rads/s (3000 rpm) for 6 min. Replace with the second specimen and continue until total running is 12 min. Stop the Accelerotor and remove the specimen.Brush or vacuum the abrasive liner to remove detritus.
8.2.3 Reversal of Line—For greater reproducibility, we recommend that after running six test specimens, you remove the collar assembly from the Accelerotor and reverse it, placing the rim that was next to the door at the back of the chamber.
8.2.4 Change of Liner—We recommend discarding an abrasive liner after running 12 specimens. If the operator has not subjected the liner to severe duty, they may use it for more than 12 tests. To check the condition of a liner, you should determine the weight loss of finish-free 78×76 cotton print cloth at the beginning of a series of tests and after intervals of six test specimen runs. You can extend the life of some abrasive liners considerably by laying them on a flat surface and scrubbing them with a nylon brush and soapy water to remove finishes or other materials that some fabrics have deposited on them. After washing, you should thoroughly rinse the liners with water and dry them before rechecking their effectiveness.
9.Conditioning
9.1 Let prepared specimens reach approximate moisture equilibrium in the standard atmosphere for preconditioning and then condition them in the standand atmosphere for testing textiles,as specified in ASTM D1776, Standard Pracatice for Conditioning and Testing Textils.
10.Testing Procedures
10.1 Method A—Weight Loss
10.1.1 Weigh the conditioned specimen on an analytical balance
10.1.2 Set up Accelerotor with the elongated,S-shaped offset,114 mm(4.5 in.) long rotor,and a fine abrasion,500J grit aluminum oxide cloth.
10.13 Crumple the test specimen and place it in the chamber.
10.1.4 Close the door, start the Accclerotor and timer,and maintain accurately,±10.48 rad/s (100 rpm),at the selected speed for the desired time. The system usually maintains the operating speed at 314.16±10.48 rad/s (3000±100 rpm) for a period of time sufficient to substantially abrade the specimen without tearing it; e.g., 2-6 min.
10.1.5 Stop the Accelerotor at the end of the time(±2 s) and remove the test specimen.
10.1.6 Brush or vacuum the liner to remove detritus.
10.1.7 Shake or vacuum the specimen free of detritus.
10.1.8 Condition the tested specimen.
10.1.9 Reweigh the specimen on an analytical balance to ± 0.001 g
10.2 Method B—Strength Loss
10.2.I Perform Steps 10.1.2 through 10.1.7
10.2.2 Remove stitching thread to restore specimen to 100×150 mm(4×6 in.) dimensions.
10.2.3 Condition specimen as directed in 9.1.
10.2.4 Deternine breaking strength byt he Grab Method given in ASTM D5034.Test for Breaking Force and Elongation of Textile Fabrics(Grab Test), placing the abraded fold of the test specimen parallel to and equidistant from the jaws of the tensile tester.The specimen must break along the fold for a valid test
10.2.5 Determine breaking strength on cocdtioned original (unabraded)spocimen.
11.Calculations and Evalualion
11.1 Method A—Weight Loss.Calculate the percent loss in weight for each specimen to ± 0.1%.
11.2 Method B—Strength Loss.Calculate the percent strength loss for each pair of specimens.
11.3 Calculate the average for each method.
12.Report
12.1 Method A—Report the average percent weight loss for the three test specimens.
12.2 Method B—Report the average percent strength loss for the three test specimens.
12.3 The report must state the exact conditions employed;i.e.,rotor speed.time,size and type of rotor and type of liner. For Method A also state the specimen size used.
13.Precision and Bias
13.1 Precision. This test method has not established precision. Until someone generates a precision statement for this test method, use standard statistical techniques to make any comparisons of test results for either within-laboratory or between-laboratory averages.
13.2 Bias. The test method defines the abrasion resistance of abrics (Accelerotor method). No independent method exists for determining the true value. As a means of estimating this property, the method has no known bias.
14.Notes
14.1 Although they are not included as part of the standard procedure,changes in such characteristics as air permeability, light transmission visual appearince hand, etc, couldbe used for evaluation, depending on the type of fabric and its intended end-use.
14.2 For additional information see:
T.F.Cooke,Abrasion Testing with Accelerotor:Reproducibility in Interlaboratory Tests,American Dyestuff Reporter,Vol. 47, No. 20,1958.,pp679-683;H.W StIegler,H.E.Glidden,G.J.Mandikos and G.R.Thompson , ” The Accelerotor for Abrasion Testing and Other Purpose,” Aimercan Dyestuff Reporter, Vol.45,No.19,1956.pp685-700.
14.3 Available form ChiuVention ;
No.1, Ganyuan Industrial Road, Shimei, Wanjiang, Dongguan, Guangdong, China; tel – +86 769 2329 4842; far +180 2511 4082; E-mail :sales@chiuvention.com;wcb sne:www.chiuvention.com
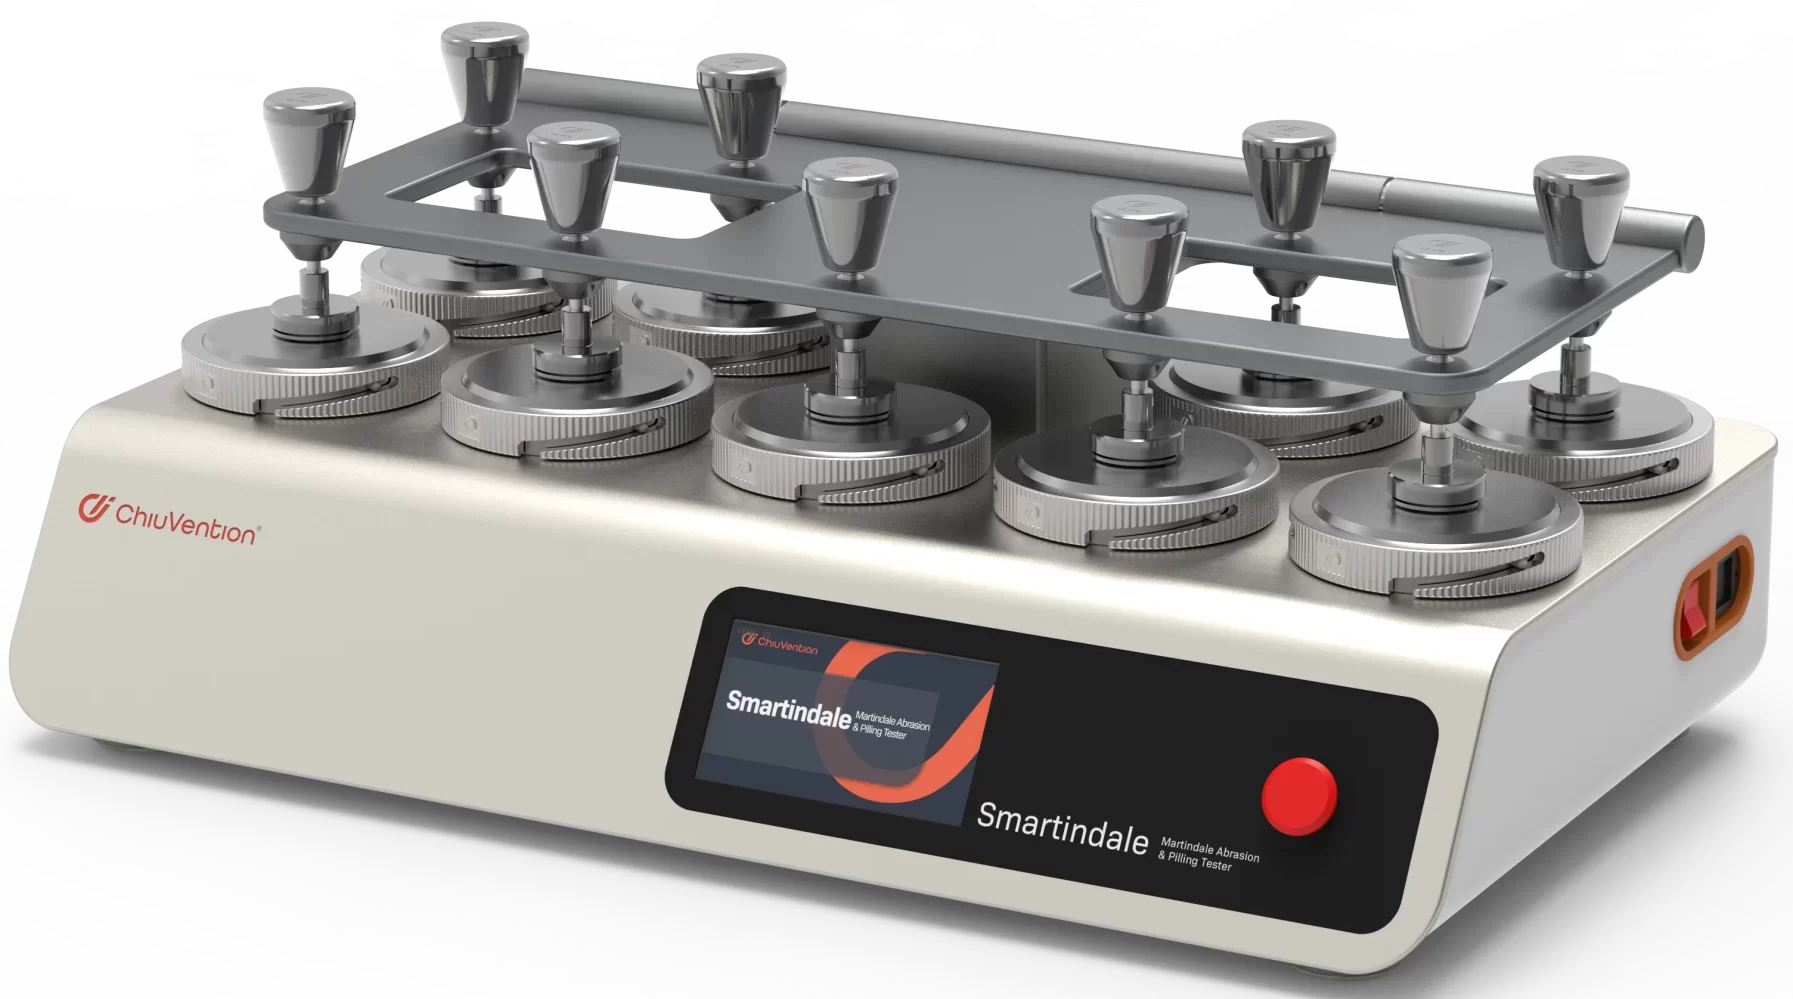
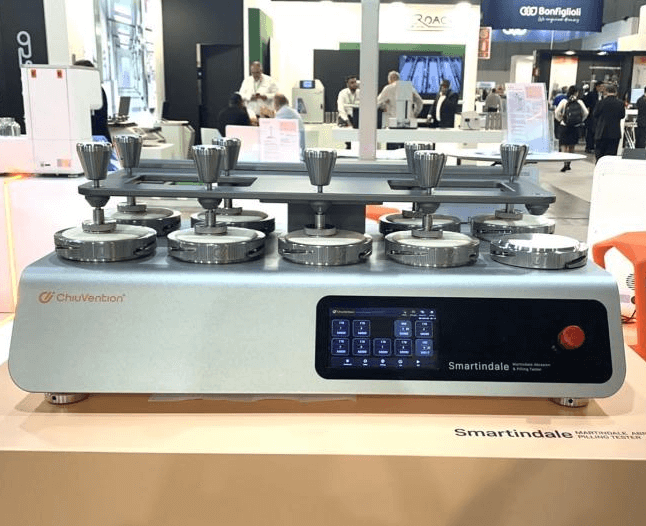
ChiuVention Martindale Abrasion and Pilling Tester instrument introduction
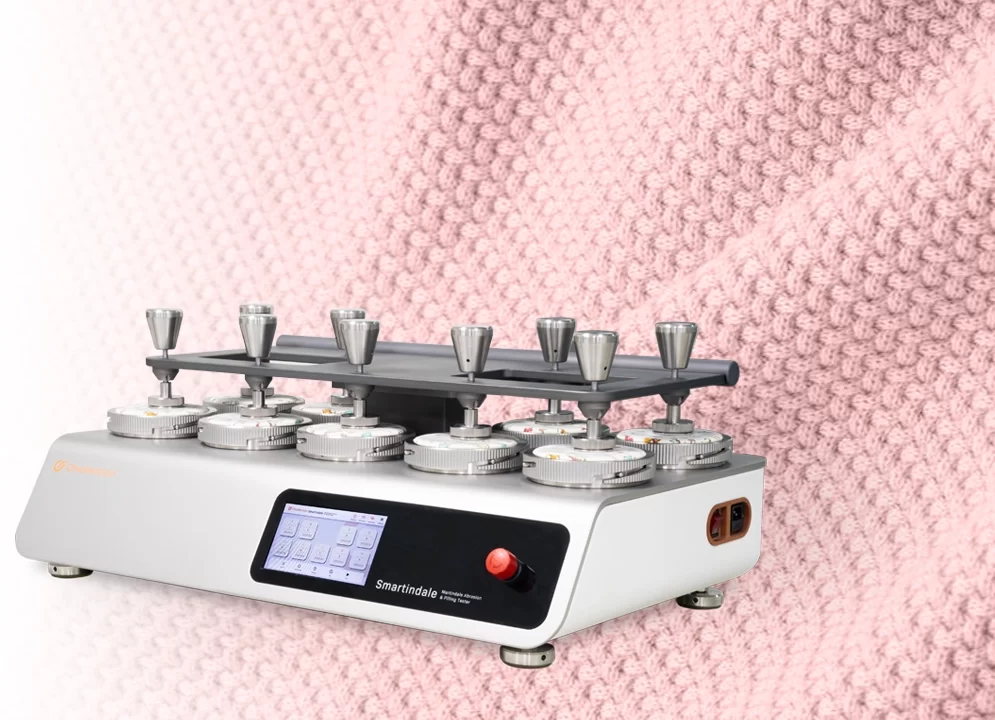
This Martindale Abrasion And Pilling Tester is used for fabric abrasion and pilling testing. It is also called the Martindale Rub Tester. This Martindale Tester generates a Lissajous curve with a digital algorithm. It then drives the friction to achieve accurate running without calibration. You can switch test modes with one click. For example, from the abrasion test to the pilling test. And you can do it without changing the pins. You can also control the Martindale Tester from your smartphone.
This Martindale Abrasion Tester can test abrasion and pilling resistance. It can test cotton, linen, silk fabrics, and woven fabrics. This Martindale Tester can also test these properties for other textiles. This includes film, knits, woolens, fake leather, gloves, synthetic, leather, and materials for labor protection. The Martindale Fabric Abrasion Tester applies to over 20 international standards. These include ISO 12945-2-2020, ISO12947-2-2016, BS EN 530-2010, and ASTM D4970/4970M-22. We also provide another type of Pilling Tester.
Application of ChiuVention Martindale Abrasion and Pilling Tester
The Martindale abrasion and pilling tester can test cotton, hemp, and silk woven fabrics. It can also test other textiles and membranes. These include knitted fabrics, woolen textiles, and artificial leather. It can also test gloves and labor protection materials.
ChiuVention Martindale Abrasion and Pilling Tester Repair and Maintenance
Clean the Martindale Abrasion and Pilling Tester often. Do this after each use. It stops dust and debris buildup. Use a soft cloth and mild cleaning solution to wipe down the surfaces.
Lubrication: Check the tester’s moving parts. Lubricate them as the manufacturer recommends. This will help prevent friction and ensure smooth operation.
Calibration: calibrate the Martindale Test Equipment to maintain accurate results. Follow the calibration instructions provided by ChiuVention.
Inspect it often. Look for signs of wear, damage, or loose connections. Replace any damaged parts promptly.
Consider scheduling professional maintenance checks. Do this with a qualified technician to ensure that all parts work correctly.
Documentation: Keep track of maintenance schedules, repairs, and any issues you encounter. This can help you troubleshoot problems more efficiently in the future.
Contact us for specific maintenance guidelines, troubleshooting tips, and spare parts. We will help you care for your Martindale Abrasion and Pilling Tester.
If you have issues or need help fixing or maintaining your Martindale Machine, please give details. Then, we can offer more tailored advice.
why choose ChiuVention Martindale Abrasion and Pilling Tester?
Smart Martindale Tester
The instrument is connected via IoT to the SmarTexLab APP in the phone/PC. And The app can connect to ERP/LIMS via an API. Or, the fabric abrasion tester can connect directly to ERP/LIMS. There are test orders and sample information in the system, and the Martindale Tester can start the test and record the sample info, test process, and test or rating results. The system will then summarize these into a Martindale abrasion and pilling test report. The report can be sent to SmarTexLab or ERP/LIMS. The relevant parties can view the report in real-time.
Test men can monitor tests for many Martindale Abrasion Testers at once. They can also change test requirements, get alerts before tests end, and stop or repeat tests remotely.
In SmarTexLab, you can set up programs to start or stop the Martindale Tester. You can chat with ChiuVention service staff for quick support. You’ll get reminders that the Martindale Abrasion Tester needs calibration, maintenance, and new consumables. Regular OTA remote upgrades are available.
Calibration-free
The dual action of the servo driver and position sensor allows the Martindale Tester Machine to achieve accurate testing continuously.
Flip-up cover for easy observation and operation
The upper cover can be easily flipped up and locked with one hand, making it easy for the operator to observe the Martindale test. It also greatly facilitates the installation of consumables and samples, and the cover’s slow-lowering device ensures the safety of the operator and the Martindale abrasion machine.
Easy to use
Bureau Veritas (Guangzhou) uses this Martindale pilling tester, which testers recognize as easy to use.
The original digital drive achieves a higher level of test accuracy.
This Martindale Pilling Tester runs on an exclusive and patented digital algorithm. It drives dual servo motors and precision slide rails. This replaces the traditional analog drive. It can generate a perfect Lissajous curve. Using rubber simulation specimens and double weight, we tested over 10 million times (equal to three years non-stop) at ultra-high friction. The Lissajous curve is still accurate and perfect. So, the Martindale Test is more reliable.
One-click to shift the testing modes
This Martindale Tester is easier than the conventional one. You don’t need to remove the top plate and change the pins. Just click one key to switch the testing modes. You can switch from abrasion to pilling test(e.g. Abrasion, Pilling, Line).
Ergonomic design
You can move the guide plate of this Martindale Tester with one hand. It closes and has an anti-collision function. This pilling tester machine is friendlier to operators.
Reliable Martindale Test
The machining and assembly are accurate. This makes the abrading table and specimen holder run parallel. The holder in this Martindale Tester has a small run out to the table (less than 0.05mm). This is better for getting reliable Martindale test results.
Designed in Germany, quality is our life.
All our textile testing equipment is developed in-house and in cooperation with a team of renowned German industrial designers, which makes our textile testing machines of outstanding quality. 100% source factory and factory price.
14.4 For special applications,piched-blade rotors 108 mm (425 in.)114 mm (4.50 in.)and 121 mm(4.75 in.)long and a 105 mm (4.25 in.) offset S-shaped rotor are available.
14.5 For special applications, users can obtain a medium fine abrasive, 240J grit aluminum oxide cloth liner. They install the liner in the same way as the fine abrasive, 500J grit aluminum oxide cloth.
14.6 Tensike strength tester as described in ASTM D76, Standard Specifications for Tensile Testing Machines for Textiles.
By mutual agreement, the team can vary the rate and type of abrasion produced in the Accelerotor by alternately using the medium fine abrasive, 240J grit aluminum oxide coth liner, the shorter S-shaped rotor, or one of the 0.26 rad (15 deg) pitched-blade rotors, and by adjusting the rotor speed from 157.08±10.48 to 418.88±10.48 rad/s (1500±100 to 4500±100 rpm), but they must include the details of these variations in the report of the test results.
14.8 It is convenient to mark specimens for cutting by means of metal, plastc or cardboard. If available,cutting dies of appropriate dimensions may also be used,however,die-cut specimcns should be raveled prior to the edge sealing .
14.9 To prevent loss of specimen weight by fraying, we apply white glue to the pinked or raveled edges of all specimens from a plastic squeeze bottle. The cement should not exceed 3.2 mm ( 0.125 in.) in width. For fabrics that have undergone die-cutting or cannot be pinked, testers should ravel specimens to 3.2 mm ( 0.125 in.). along each edge and adhesive applied as above.
15. Why should I choose the AATCC 93-2016 test method?
The main reasons for choosing the AATCC 93-2016 test method include its wide range of applications, scientific nature and standardisation.
The AATCC 93-2016 test method is used to assess the abrasion resistance of fabrics and other flexible materials and is suitable for testing the abrasion resistance of a wide range of textiles and garments. By simulating the abrasion of fabrics during high-speed rotation and impact, the method enables a comprehensive assessment of the abrasion resistance of fabrics to ensure their durability in actual use.
Principle and operation of the test method
The principle of the AATCC 93-2016 test method is based on a fabric sample in a free state being driven by an impeller and travelling in a sawtooth pattern along a circular track inside a cylindrical test chamber. The sample is repeatedly impacted against the walls of the test chamber and the friction liner, while being subjected to the impact action of the extremely fast, high-speed rotating impeller. During the test, the sample is subjected to bending, friction, impact, compression, tension and other mechanical forces resulting in yarn-to-yarn, fibre-to-fibre, surface-to-surface and surface-to-abrasive wear. The abrasion resistance of the textile is assessed by the loss of mass of the specimen or the loss of tensile strength of the gripped sample when the specimen breaks at the abrasion fold.
Alternative and related standards
Although AATCC 93-2016 is the current standard, there are other related standards for reference, such as FZ/T 01151-2019 Test Method for Abrasion Resistance of Textile Fabrics Accelerated Friction Method and GB/T 21196.4-2007 Determination of the Abrasion Resistance of Textile Fabrics by the Martindale Method Part 4: Evaluation of Appearance Changes. These standards provide different test methods and evaluation indexes, and users can choose the appropriate standard for testing according to specific needs.
16. What instruments are used for the AATCC 93-2016 test?
The instrument used for the AATCC 93-2016 test is the AATCC93 Accelerated Abrasion Tester. This tester is primarily used to test the abrasion resistance of textiles and other flexible materials. The principle of operation is that the sample to be tested is tumbled in a cylindrical test chamber lined with friction material at a regular time and speed, the tumbling action is generated by a metal slurry impeller, the sample is sufficiently impacted on the front and back sides and repeatedly comes into contact with the wall of the test chamber, and the rate of loss of mass is calculated according to the mass of the sample before and after the abrasion.
The main technical parameters and operating methods of the instrument
Testing speed: 100~3500r/min adjustable
Impeller: slender S-shaped, length 114±2mm, thickness 3±0.5mm
Polyurethane foam liner: thickness 3.2±0.1mm
Abrasive: 500 mesh water sandpaper (FZ), 250 mesh water sandpaper (AATCC)
Abrasive pre-ground cotton fabric: 115±10g/m²
Usage and maintenance of the instrument
The use method and maintenance of the abrasion resistance tester mainly include the following steps:
Using method
Preparation:
Check whether the appearance of the instrument is intact, whether the power cord and interface are normal, and make sure there are no damaged or loose parts.
Use a soft dry cloth to wipe the surface of the instrument to ensure that there is no dust, oil and other impurities.
Prepare the specimen, which should be flat, undamaged and cut according to the specified size and shape.
Install the specimen:
Fix the specimen on the specimen fixture, ensure the flatness and fixing firmness of the specimen.
Adjust the contact force between the specimen and the sandpaper to ensure proper lateral pressure.
Setting test parameters:
Set the test parameters according to the test requirements, such as rotational speed, wear load, etc., to ensure that the parameters are set accurately and in accordance with the test standards.
Start the test:
Turn on the power switch and start the abrasion resistance tester, make sure the instrument runs stably without abnormal sound or vibration.
Place the specimen on the sandpaper, make sure that the specimen is in close contact with the surface of the sandpaper, adjust the position and angle of the specimen fixture and the sample support device, so that the specimen is subjected to uniform force.
Repeat the test with data recording:
Repeat the test several times to obtain more accurate wear data. Check the flatness and fixation of the specimen before each test to ensure the consistency of the test conditions.
Record key data such as specimen wear and test time.
End Test and Instrument Maintenance:
At the end of the test, switch off the power switch and stop the instrument operation.
Clean up the test site, return the specimen, sandpaper and other items to their places, and keep the instrument and the environment tidy.
Carry out routine maintenance and care of the instrument, such as regular cleaning, check whether the parts are loose, etc.
How to use: Place the sample to be tested in the test chamber, set the test speed and time, and start the instrument for testing. At the end of the test, the rate of mass loss is calculated based on the change in mass of the sample before and after wear and tear.
Maintenance
Clean the instrument regularly: Clean the abrasion tester regularly to keep the surface of the instrument clean and prevent the machine from being crushed by heavy objects.
Keep the instrument dry: Keeping the abrasion tester dry prevents safety accidents such as short circuits and fires, and also helps to reduce the wear and tear of the machine. Keep the machine in a dry, ventilated and cool place, protected from moisture and kept clean.
Adopt good habits: When using the abrasion tester, observe the time of use and the specified number of samples, and pay attention to the frequent testing of the sample clip fixation to avoid any damage to the instrument.
Maintenance: Check the wear and tear of the impeller and liner regularly and replace them when necessary. Keep the instrument clean and avoid dust and debris from entering the test chamber. Calibrate the instrument regularly to ensure the accuracy of the test results.
By taking the above steps, you can ensure the safe use and accurate measurement of the abrasion resistance tester, as well as extend its service life.
For more information on textile testing methods/standards
or textile testing machines, contact us:
What’s App: +86 180 2511 4082
Tel: +86 769 2329 4842
Fax: +86 769 2329 4860
Email: medium@chiuvention.com
